 |
Step 6
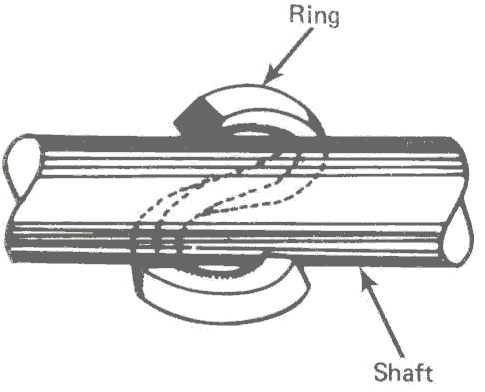
As shown in the diagram, install a packing ring on the shaft. DO NOT open up the ring to force it around the shaft. It will damage the packing. Instead of opening up the ring, use the “S” shaped twist as shown. Gently form the packing material into a closed ring around the shaft.
Step 7
Gently tap the installed ring into the stuffing box. Make sure it goes all the way to the back of the stuffing box.
Step 8
Install the second ring in the same manner as the first. For the second ring make sure the cut point is 90 degrees away from the previous ring. The cut points in a series of rings should not be above or next to each other.
Step 9
Install all of the necessary rings until you reach the lantern ring region. Lubricate and install the lantern ring.
Step 10
Install remainder of the rings in a manner described earlier.
Step 11
Install the gland. It should extend out of the stuffing box about one-third of the total packing depth. This will give enough room to tighten packing as it gets old.
Step 12
Tighten the gland slowly. As you tighten the gland, rotate the pump shaft gently by hand. This will ensure no “binding” is taking place. Sometimes if the gland is tightened improperly the gland follower can jam against the shaft. After tightening the gland slightly, back off on the nuts and leave them finger tight.
Now you are ready to put the pump back in service.